To start off I am very happy with my final trailer. I felt that I used several key techniques such as KeyFraming, AutoFraming, Morphing, Reactor animating and biped and footstep tools. I have show that i can use multiple techniques to animate and I hope it has come across like this in the trailer. The funnest part of the this course for me has been animating, as I do not see myself as a very good artist and preffer to animate and put what knolage of editing to good use.
I found that the hardest part of the course was the model making as I have never been very artistic and this really let me down. It also made animating more difficult in certain ways, for example my james bond character model was twice as hard to animate as it should have been because I modeled him with his arms and legs to close to his body.
I feel that with more time I could have made a better trailer all round, especially with model design. I could have also made more unique bones for my james bond model rather then using 3D Studio Max's biped tool, as this made it more difficult to fit the model to the rig.
My favourite part of the trailer is the scene at the end of the james bond model fireing a gun. This is mostly due to how happy I was using the morpher and reactor to make the animation look realistic. The only part i didnt like with this was the james bond model's fingers and arm joint, as these looked flat and in-human because of the problems rigging the model.
In conclusion i am quick happy with the project as a whiole. I feel I learnt lots of new techniques and used them in the best way to create my trailer. I would like to be able to create better looking models, but until my artistic skills advance this is an impossibility. The course had deffenatly made me think more about how much work animators put into there work and how much quality is lost on the final product.
Thursday 14 April 2011
Final Animation
The final animation was finished after the last scene was completed. I used Adobe Premiere Pro CS5 to edit each clip and place them in order. After this I added transitions to avoid my animation looking to chopped up and then picked the best part from the music track to place on the animation. The sound effects where put in last as if anything was to be moved while editing the sound effects would be disorganised.


Editing in CS5.
Final Animation.
A note to add with the trailer is that I am aware that there are a lot of fade to blacks, and a blank delay at the end. These were most intentional and not for the sake of making a longer trailer. The animations themselves make up roughly 30 seconds give or take a second. The trailer is slightly longer because I wanted to to look good with different transitions, as well as alowing the music to finish at a good point, rather then just cutting it off.
I want to make it clear that the blacks are edited in with the trailer to make it look more complete, and not to fill time as my animations all together came to 30 seconds.
Reference:
"Another Way To Die" Jack White and Alicia Keys 2008
Digital Track
[14/4/2011]
All other sounds used in the trailer where either created by myself or downloaded from the royalty free sound effects website, www.findsounds.com
I would also at this time like to reference the head of my James Bond model. All credit for the original head goes to Richard Barns. I originally planed to have the trailer without a head and just use low angle shots but then found it difficult to follow. I would have liked to have used my own model head but due to time and more honestly, lack of personal skill I was unable to do so.
Updated Scene Numbering
Since the storyboard has changed, and it is proving difficult to get them scanned and uploaded, I have written out a new list detailing scenes and where they will appear in the trailer. The storyboard will be included with the handed in version of this blog.
Scene 1 - Starts with the 2 sky scenes, where james bond walks over a hill into the camera shot.
Scene 2 - Multiple shots of the car chase scene which was filmed in 6 different camera angles. These have been filmed in order and will be placed on the animation 1 - 6.
Scene 3 - This will be the 007 logo that displays towards the end of the animation.
Scene 4 - The final scene will be of james bond fireing his gun towards the camera.
The music to accompany this will be the theme written for quantom of solace, "Another Way To Die" by A=Jack White and Alicia Keys. This will be played over the top of most of the animation, and only include the instrument part of the song at the begining. Several sound effects like car engines and gun shots will also be added and to the final animation.
Wednesday 13 April 2011
Scene 3
My final scene is complete and I am now working on putting the animation together. The last scene to complete was added in after deciding I wanted more in the trailer. The clip is around 5 seconds and will be used in two parts during the animation. The scene contains my 007 model walking over a hilly foreground, with a skyline behind him. This was originally going to use the daylight feature for lighting but after many problems with shadows and effecting material colour, even when opacity was set to 100, I decided to opt for a clip without lighting.
The scene has 007 walk towards the camera with a weapon in his hand, being my G36 model. The movement was at first done by keyFraming but after discovering the bipeds "footstep" tool I decided to opt for the technique on the basis that it looked more human and realistic then the motion I had created with keyFrameing.
The scene has 007 walk towards the camera with a weapon in his hand, being my G36 model. The movement was at first done by keyFraming but after discovering the bipeds "footstep" tool I decided to opt for the technique on the basis that it looked more human and realistic then the motion I had created with keyFrameing.
 |
| The bipeds "footstep" tool. |
This is done by hylighting the bipeds main point and then moving through to the footsteps icon in the modify list. This then allows you to pick the number of steps, length, distance, time and many other features to help make each animation unique.
The first part of Scene 3.
The second part of the scene is just a 2 second render of a still image. The reason I did this was purely because at the time my train of thought was, "if it's to long, I can cut it. If it's to short, I have to re-render" and the first choice seemed smarted to me.
The second part of Scene 3.
Morphing in my Animation
In my second scene I used both the morpher and reactor tools inside of 3D Studio Max. The scene included a shot of 007 kneeling on the ground infront of his DB9, fireing the G36. The shot was created using all 3 of my models (007, Aston Martin and G36 with bullet.)
I started by inserting the biped tool inside of my 007 model and attaching it in the same way I would if I had created my own bones. Looking back my own bones would have been easier to control the model as the biped proved difficult at times. The model then had any outstanding polygons added to there corisponding bones and began to move the model into shape. The first thing i noticed about this was that my model was built in a difficult position and made adding bones difficult. This then led to having bad shapes and a poor looking model to animate with, and given the time I would return to it and start over. The one addition I did make to the model was his hair, made by simply changing polygones ID and colouring them in a different colour. Also later on in the animation I noticed that his face had no expression and so used the morph tool to make his facial expression change towards the end of the scene.
The next thing I did was bring the gun into the scene and begin to morph it so that the release chamber opened on the side of the gun. This is not completely accurate to the gun but for the purposes of shoping different techniques I thought this was a good idea and infact came out quiet nicely. The morph was made by creating a copy of the same object, changing the copy to how I would like it to look, and then adding the morph tool to the origonal. This then allowed me to change the look of the gun easily and quickly.
The chamber that comes from the side of the gun was then animated using the reactor tool. I did this by adding the chamber and its container to the reactor and setting the chamber to have a mass of around 3 or 4. I then keyFramed a small side movement for the chamber to move sideways, and then the reactor did the rest by adding a gravitational pull towards the floor. This gave a very satisfiying look which I was very pleased with.
The end of the bullet then had to be added which in comparison took little time. i simply moved to the frame where the chamber was removed from the gun and had the bullet come out around the same time. To repeate this I made several copies of both bullet and chamber, and then moved there animations along the timeline.
After this was complete I added the Aston Martin and the background along with the the camera. The camera was made to pan and zoom by using the truck, orbit and dolly camera tools. I felt that this was a good camera shot as the shot was suppose to be a slowed down shot of 007 shooting.
Overall i am very happy with this scene. I used a variaty of tools and made a clean animation. If i could change it however I would deffinatly go back and re-design the 007 model, as well as look into lighting more. I was able to use lighting in my first scene via the daylight system however I found that when adding a muzzel flash into the animation it had problems working with the daylight system again.
I started by inserting the biped tool inside of my 007 model and attaching it in the same way I would if I had created my own bones. Looking back my own bones would have been easier to control the model as the biped proved difficult at times. The model then had any outstanding polygons added to there corisponding bones and began to move the model into shape. The first thing i noticed about this was that my model was built in a difficult position and made adding bones difficult. This then led to having bad shapes and a poor looking model to animate with, and given the time I would return to it and start over. The one addition I did make to the model was his hair, made by simply changing polygones ID and colouring them in a different colour. Also later on in the animation I noticed that his face had no expression and so used the morph tool to make his facial expression change towards the end of the scene.
 |
| Using the morpher tool to add facial features. |
The next thing I did was bring the gun into the scene and begin to morph it so that the release chamber opened on the side of the gun. This is not completely accurate to the gun but for the purposes of shoping different techniques I thought this was a good idea and infact came out quiet nicely. The morph was made by creating a copy of the same object, changing the copy to how I would like it to look, and then adding the morph tool to the origonal. This then allowed me to change the look of the gun easily and quickly.
The chamber that comes from the side of the gun was then animated using the reactor tool. I did this by adding the chamber and its container to the reactor and setting the chamber to have a mass of around 3 or 4. I then keyFramed a small side movement for the chamber to move sideways, and then the reactor did the rest by adding a gravitational pull towards the floor. This gave a very satisfiying look which I was very pleased with.
 |
| G36 with moropher set to 0. |
 |
| G36 with morpher set to 100. |
The end of the bullet then had to be added which in comparison took little time. i simply moved to the frame where the chamber was removed from the gun and had the bullet come out around the same time. To repeate this I made several copies of both bullet and chamber, and then moved there animations along the timeline.
After this was complete I added the Aston Martin and the background along with the the camera. The camera was made to pan and zoom by using the truck, orbit and dolly camera tools. I felt that this was a good camera shot as the shot was suppose to be a slowed down shot of 007 shooting.
 |
| Wireframe of models and Biped. |
 |
| Models with textures. |
Overall i am very happy with this scene. I used a variaty of tools and made a clean animation. If i could change it however I would deffinatly go back and re-design the 007 model, as well as look into lighting more. I was able to use lighting in my first scene via the daylight system however I found that when adding a muzzel flash into the animation it had problems working with the daylight system again.
Test render to cheak Reactor appearence.
Scene 2 has now been rendered and added to the trailer clip.
Finished render of scene 4.
Monday 11 April 2011
Scene 1 Of 2
The first of my 2 main scenes has now been rendered. The scene I rendered first was the car chase where an Aston martin is chased by 2 Mitsubishi Evolutions. This scene was filmed using a mountain road set, which is featured at the begining of the film. The scene was shot using 6 different cameras using both KeyFrames and AutoFrames to move the objects. The shot of the car driving off the edge of the cliff was ment to be done using the reactor tool, however problems with this arrose and it is being used in the second scene.
The scene itself fills around a 20 second gap, however once edited together and cut into the correct places, the scene should last no linger then 10 seconds. Having multiple shots and angles is always good in film making as most shots used in films should be no longer then around 3 - 5 seconds.
The following videos shot the 6 seperate camera angles, before being added into the final project. The animations where all rendered using the mental ray renderer, and shot at a size of 1280 x 720.
Camera 1 of Scene 1
Camera 2 of Scene 1
Camera 3 of Scene 1
Camera 4 of Scene 1
Camera 5 of Scene 1
Camera 6 of Scene 1
SWOT Analysis
My SWOT for using 3D Studio Max
Strengths
Weaknesses
Opportunities
Threats
Strengths
- Being able to use HotKeys effectivly helped a lot when trying to use the program. A lot of people use programs without being able to, or known most of the shortcutKeys which makes working on Studio Max a lot more effective and therefore quicker.
- My ability to learn has helped me a lot as well as being a new topic and program people can sometimes find it overwelming and difficult to remember. I find however that I learn helpful tips easily, which helps my overall performance later on.
Weaknesses
- My first weakness is my lack of skill and artistic talent. I can openly admit to being able to draw and design only the very basic images and models, and this makes it difficult when the program and subject rely heavily on these factors.
- Understanding of the program. I know, as stated above, meny of the shortcutKeys and tools inside of the program, however i do not know how the program works in respect to things like the reactor, renderer and texture devices. I have had several occasions where the program has seemed to fault, bring up errors and even delete work and crash, and I believe if I new more about the program I could do more to prevent these things from happening.
Opportunities
- To create my own models is a big opportunity for me. I have always wanted to be able to 'mod' or 'modifiy' games and is partly the reason i began this course. After learning skills and how to use this program I can now work toward creating my own, highly detailed models for such modifications, as well as any animations I may want to create.
Threats
- Render Time is a big threat for 3D Studio Max. Rendering a simple scene of a few seconds can take well into several hours of time if there are a lot of effects and images. The more detailed the models and animations are, including special effects such as explosions and lighting effects the longer the render time will be.
Changes to my animation
With only a couple of weeks left and still much work to be done I decided that in order to complete my animation I would have to change my ideas slightly. At first i was considering adding in a longer chase scene, including a gun fight and explosion. I felt that this however would look more like a scene from the film rather then a trailer.
Looking back at my work my storyboard was mostly of the car scene, giving little chance of using more techniques other then KeyFraming and autoFraming. This ment redesigning my ideas and plan out a new trailer.
The idea I have decided to go with is that of a second long scene, played before the driving scene. This will be of my James Bond model walking a few feet, lifting the G36 model to his shoulder and fireing several shots. The gun will be animated using the morphing tool, so that when a bullet butt is frown out of the chamber, the gun morphers to represent this. The bullets will then travel a small distance before fading to black.
I also plan on using the reactor in the same scene, to have the bullet butts fall to the ground once they are projected from the gun's chamber. Understandably this may not sound very clear, but I hope to have a quick mock up soon to show my new idea.
New Model - Mitsubish Evolution X Series
I created a new model for the animation to include as the enemy cars in the chase scene. This car was based on a Mitsubishi Evolution X series which has been used in many films. The scene I was animating actually had 4x4's in the scene instead but I found that modelling the 4x4 was a lot more difficult and not as fun. By this time and looking at others animations
I have come to the conclusion that most students animations don't follow the 007 story in detail. For this reason I am trying to consentrate on learning and using the skills show to me in lectures, and have fun while doing it, rather then animating something I don't find interesting. I plan on sticking to the main storyboard and film narrative as much as I can but if there are complications, or I find myself wanting to do something more interesting I have no problem changing my animation.
The Mitsubishi car model was created in much the same way the Aston martin was, but in less time. I feel that although the quality of the car is roughly the same as the Aston, but took around 4 ours less,, it shows that atleast to myself I have gained skills and started to work more effectivly.
The car below does however use a model designed by a "free to use" website which is refferenced below. This was because i found detailing wheels to give the appearence of movement very difficult and decided my time was better spent of designing the animation opposed to a new model.
The wheel I used was designed by a user name, Matakus on the webstight www.turbosquid.com. A link to his model is posted below. The wheel was taken from the SUV and resized and shaped to fit my model.
http://www.turbosquid.com/FullPreview/Index.cfm/ID/374510
I have come to the conclusion that most students animations don't follow the 007 story in detail. For this reason I am trying to consentrate on learning and using the skills show to me in lectures, and have fun while doing it, rather then animating something I don't find interesting. I plan on sticking to the main storyboard and film narrative as much as I can but if there are complications, or I find myself wanting to do something more interesting I have no problem changing my animation.
The Mitsubishi car model was created in much the same way the Aston martin was, but in less time. I feel that although the quality of the car is roughly the same as the Aston, but took around 4 ours less,, it shows that atleast to myself I have gained skills and started to work more effectivly.
The car below does however use a model designed by a "free to use" website which is refferenced below. This was because i found detailing wheels to give the appearence of movement very difficult and decided my time was better spent of designing the animation opposed to a new model.
 |
| Working on the first half of the car. |
 |
| The car fully complete using symetry. |
 |
| The rendered model. |
http://www.turbosquid.com/FullPreview/Index.cfm/ID/374510
 |
| The wheel i used for my Evolution model. |
First Rendered Scene
First off I should note that these were done atleast a week ago but have just not been uploaded to the blog.
The first animation I decided to do was a very simple credits page, start slow and work my way into the animations. For this I designed the 007 logo inside of 3D Studio Max using the text tool, extruding and placing infront of a black, plained backdrop.

I then followed this by adding more walls or planes around the image and at the far end creating several directional spot lights. This was so that as i animated the text, (using Keyframes as well as the autoKey function), to come towards the camera the lights would shine onto the text and iluminate the logo.
After creating the animation several times I finally found a rendition that looked good.
Wednesday 6 April 2011
Reactor - Havok Engine
This tutorial was quiet easy to complete and showed several ways in which animating models can be made easier then creating them frame by frame. Using tools like this could be used in many ways including helping me animate parts of my project.
The process begins with creating objects and creating new rigging objects. Once this is complete you can add objects to the same reactor and set there properties to effect each other in the same way. For example in our tutorial we added a bowling ball and a flat box to create a bowling lane, and then added the pins to the same reactor. We could then change the gravity and other properties so that they were all effected by the same down force.
The ball is then given energy to move forward by animating a small section of the ball moving forward, and then starting the reactors animation from a frame inside of the 2 key frames. This means when the reactor animates the scene the ball is already in motion and continues to use the movement force it was given until it starts to come into contact with other objects, causing friction. This causes not only objects to rappel, bounce and roll but also slow down with greater amounts of friction. This causes a more realistic sense of movement and once converted to an animation can make a very difficult scene to animate pass in seconds.
These techniques could be very useful to create animations such as bullet events, car crashes and even character movement.

The first part of the tutorial we experimented with the reactor and to test the engine I moved the bottom plane on an angle to see if the ball would roll.
The next part of the tutorial had us create the 3D bowling ally. The models where already in place and just required animating.
The process begins with creating objects and creating new rigging objects. Once this is complete you can add objects to the same reactor and set there properties to effect each other in the same way. For example in our tutorial we added a bowling ball and a flat box to create a bowling lane, and then added the pins to the same reactor. We could then change the gravity and other properties so that they were all effected by the same down force.
The ball is then given energy to move forward by animating a small section of the ball moving forward, and then starting the reactors animation from a frame inside of the 2 key frames. This means when the reactor animates the scene the ball is already in motion and continues to use the movement force it was given until it starts to come into contact with other objects, causing friction. This causes not only objects to rappel, bounce and roll but also slow down with greater amounts of friction. This causes a more realistic sense of movement and once converted to an animation can make a very difficult scene to animate pass in seconds.
These techniques could be very useful to create animations such as bullet events, car crashes and even character movement.

A screenshot of my first reactor experiment.
A video showing the first reactor animation.
The next part of the tutorial had us create the 3D bowling ally. The models where already in place and just required animating.
A video showing the second reactor animation
Wednesday 23 March 2011
Bones
The lecture showed us how to add bones to a body and then manover them in specific ways. The lecture gave us a torso shape to work with and explained how to add bones to the arms and torso. This is done by creating bones inside of the object, and then linking them to the torso using the skin tool. This can be difficult to get right at first but using the front, back and side bones tool i managed to position the bones in the centre of the torso object.
This ment it was easier to arrange body parts and will make animating objects much easier. To show an example of this I created a short animation using the boned torso.
 | ||||
| Working on the bone structure inside of StudioMax. |
This ment it was easier to arrange body parts and will make animating objects much easier. To show an example of this I created a short animation using the boned torso.
A short animation using the boned Torso.
Tuesday 22 March 2011
Morphing Heads
This week we morphed a human head, using seperate techniques. There is a tutorial missing, which included bone structures on models which will follow shortly. The head was turned into an editable polygon and then cloned around 10 times. This then allows me to make individual changes to each head and then use the seperate head items in the animation at different times. For example the shocked face at the end of my short animation was used using 4 different head items, including the two eyes, both from different heads, a smile item and an open mouth item. Creating the smile was created using both the smile and closed mouth items combined, making the mouth appear more realistic.
TurboSmooth is also only applied to the key head where the morphing tool is initiated, meaning less time and trouble creating new face items.

TurboSmooth is also only applied to the key head where the morphing tool is initiated, meaning less time and trouble creating new face items.

A head using the morph tool inside 3D Studio max.
The animation was tricky even though very short as I would continuesly set key frames some items while leaving others without them, meaning the animations items would merge at times they wernt suppose to. This ment deleating key frames and starting the animation over several times to get into the habit of locking each head item at every key frame.
My finished short head animation.
Tuesday 8 March 2011
Animation
My first attempt at animation lead me to create a ball, and use the curve tools to makes a bounce line. I then editied the shape of the ball to give it the appearence of squashing, and then looped this animation. I then created 2 more copies, with the same animation and used the dope sheet to offset one ball to be delayed, and one to be ahead of the first ball, meaning that all 3 balls bounce at slightly different times. I then followed to do my first full animated render and have uploaded the product above.
Friday 4 March 2011
StoryBoard
For my animation i have decided to follow the same path as one of the first scenes in Quantom Of Solace which is the car chase. I enjoy this scene the most because of its cars and gunfire. The trailer will include other scenes but for the time being the animation I want to create is mostly to do with this opening scene. I don't want to follow the full scene as i would like to have my own parts inserted aswell. The storyboard shows most of the key scenes in the first chase scene and will work as a template for my trailer.

The car appears, showing seperate parts of the car with cuts to black between each shot.

The scene will include multiple shots like these with gun fire, fast driving and hopefully a slow motion bullet shot, with a 360 pan around the bullet in motion.

The trailer will end with the enemies being killed and some sort of explosion. James Bond will then leave the shot, back to the camera however I have not decided how, either in the DBS/9 or on foot, holding the G36 model.
James Bond Model
The third model i created was a rendition of James Bond. At this point I ha used up most of my time creating the Aston Martin and so set out to create a basic model with some detail, which could be improved upon as needed. I feel I accomplished alot more then i set out to achive and am happy with the final basic model. The only thing needed to be edited with it is the facial features need to be created.
I started by creating a block outline using one box and then creating more polygones from it, much in the same way i created the Aston. This took a relitivly small amount of time as the body didnt need to be detailed at this point.
 First Wireframe pospective of model.
After doing this I decided to use a different technique which would make the model a lot more symetrical. Therefore I cut off half of the models body, and made the detailed alterations to only one half. This then ment that I could mirror the model, flip it and then add it using the Boolean tool. After doing this and creating one object I just needed to wield the 2 halfs together to create one body model.
 One half of the model.
 The 2 seperate halves of the model after using Boolean to join them, but before i started wielding.
 The body after the Boolean tool was used and wielding was complete.
I then added a meshSmooth and turboSmooth effect to my model which then created a much smooth, realistic body shape for my model. This was key to creating a set of cloths for the model that would fit well. To create the cloths I used the garment marker tool which effectivly uses a set of vertexs and seams to join the two together, creating 3D polygons. This took time to understand but created some very realistic clothing for the character model and could be used in many other useful ways.
 The model with meshSmooth and turboSmooth in effect.
 Using the garment tool and adding seams onto the model.
 Using the garment tool and adding seams onto the model.
 The option section of the cloth tool, choosing what material and how the material will wrap.
 The option section of the cloth tool, choosing which object to collide with, in this case the character model. This makes the 2 parts conect around the model.
 The model with both shirt and trouser cloths designed and resized to fit correctly.
After this I then went on to creating the shoes and face for the character. The shoes took little time and the face started off as half a face. The face was created by using a box 6x6 and then moving vertexs to create detail. I created a basic shape for the face and then saved this as a seperate model. The face was then mirrored, rotated and joined to the otherside using the boolean tool. Once this was created i used the turboSmooth tool to smooth out the lines creating a very basic head shape with little detail. I did this for 2 reasons, the first oviasly being the time restrictions, but secondly being that im not sure whether the head will ever face frontways in the animation, and therefore detail might not be needed on the model.
 The first half of the head.
 The 2 halfs being joined together.
 The final render.
The final model does still need work to be done on it, mostly being detail and reshaping to the head, although im still very happy with the way the cloths look on the model and the basic model shape. Im also happy with the tools that i have learnt as I learnt even more tools then when creating the Aston Martin and feel I could create more and more detailed models the more I Progress.
I started by creating a block outline using one box and then creating more polygones from it, much in the same way i created the Aston. This took a relitivly small amount of time as the body didnt need to be detailed at this point.

After doing this I decided to use a different technique which would make the model a lot more symetrical. Therefore I cut off half of the models body, and made the detailed alterations to only one half. This then ment that I could mirror the model, flip it and then add it using the Boolean tool. After doing this and creating one object I just needed to wield the 2 halfs together to create one body model.


I then added a meshSmooth and turboSmooth effect to my model which then created a much smooth, realistic body shape for my model. This was key to creating a set of cloths for the model that would fit well. To create the cloths I used the garment marker tool which effectivly uses a set of vertexs and seams to join the two together, creating 3D polygons. This took time to understand but created some very realistic clothing for the character model and could be used in many other useful ways.


After this I then went on to creating the shoes and face for the character. The shoes took little time and the face started off as half a face. The face was created by using a box 6x6 and then moving vertexs to create detail. I created a basic shape for the face and then saved this as a seperate model. The face was then mirrored, rotated and joined to the otherside using the boolean tool. Once this was created i used the turboSmooth tool to smooth out the lines creating a very basic head shape with little detail. I did this for 2 reasons, the first oviasly being the time restrictions, but secondly being that im not sure whether the head will ever face frontways in the animation, and therefore detail might not be needed on the model.


The final model does still need work to be done on it, mostly being detail and reshaping to the head, although im still very happy with the way the cloths look on the model and the basic model shape. Im also happy with the tools that i have learnt as I learnt even more tools then when creating the Aston Martin and feel I could create more and more detailed models the more I Progress.
Aston Martin Model
For my second model i decided to test myself and my ablilitys and create a model of an Aston Martin DBS. This would be difficult for me as up till now I have done very little modeling and only learnt several tools, however throughout creating this model i have learnt meny including the chamfer tool, used mostly to create the wing mirrors.
The first problem hit straight away as after hours of searching i came to the conclusion that there was only 1 set of schematics for a DBS and these where not to scale and difficult to see. After attempting to draw it using images of the car i decided to change the design slightly by designing an Aston Martin DB9, which is close cosmeticly to a DB9 already. This was a problem at first but considering the vast amount of schematics for the DB9 it was a good choice to change.
Once I set up the viewports and arranged the bitmaps I started by creating the cars inner wheel arch using a simple tube and then cutting the parts I didnt need. This was only done on one side however as I was only planning on creating one side of the car and then using the symetry tool to make it a full DB9. After I created the wheel arches I then proceded to create new polygones from the wheel archs and continued to do so to create the basic shape for the car. This is a time consuming method but for me I felt it was the least complicated method.
 Car Wheel.
After the basic shape was complete I went on to design a wheel and inside alloy for it. This was done by creating 2 tubes and making one smooth (having more sides) and then making the size of each look correct. The back was created with a plane but now nowing how to effectivly use the cap and flip tools I will change the plane for a face made from the tubes.
 Car half before Symetry.
The car now had 2 wheels, a basic shape, and cut out sections for windows. This had already been quiet time consumming and a third model was still needed to be made. I moved on to mirror the car using the symetry tool and then copied and moved both tires to create 4 wheels for the car.
 The Aston Martin in wireframe mode, with completed shape and wheels.
The next step was to then start creating the windows for the Aston. The way i did this was by selecting the windows outlines, extruding them slightly to give depth, and then fill them with a seperate object. This object started as a box with multiple vertexs, which where slowly lined up with the window edge to create smooth windows. This was done for both side, front and rear windows.
 Car before windows where created.
 Car after windows where added.
The next step was to create headlights for the car. I found this to be one of the more difficult parts as i had trouble making them look relistic. Infact i took several long attempts which proved to end with unrealistic models(See below). Eventually i managed to create something that looked more realistic by extruding a small gap in the car, and then using the same technique I used for the windows, cover up the holes I had created.
 A failed attempt at creating headlights.
 The final headlight design, looking a lot more realistic after using the turboSmooth tool.
The next thing to create was the wing mirrors. I did this by creating a block, shaping it and then extruding a space for the mirror block to be placed, like the window. The back was then curved and the shape was created using the chafer tool to create smooth corners. A box was then used to create the mirror and it was fitted the same was as the windows. A small cylinder was then added to use as a conection between the car and wing mirror. After this was fitted i then copied and mirrored a second wing mirror to fit on the opposite side.
 The starting mirror block.
 Using chafer to curve the corner of the wing mirrors.
 The windg mirror having its rear end curved for a more realistic look.
 The wing mirror design without the mirror or cyclinder.
After completing the model I then proceded to texture all of the different aspects of the model. The car and wheels where textured with car paint black/gray/silver whith the alloys being a slightly lighter silver. The windows and and lights where then textured with a reflective material with a 50% decrease in its alpha, meaning that they appeared more as black out windows. This was done because the interior of the car was not created, as this would be a waste of time for the animation.
 Final Rendition of the model.
The model was eventually finished with some detail. I would still like to work on it and add more detail such as working lights, front and read grills and door handels, but these are small editions that can be made later on.
The first problem hit straight away as after hours of searching i came to the conclusion that there was only 1 set of schematics for a DBS and these where not to scale and difficult to see. After attempting to draw it using images of the car i decided to change the design slightly by designing an Aston Martin DB9, which is close cosmeticly to a DB9 already. This was a problem at first but considering the vast amount of schematics for the DB9 it was a good choice to change.
Once I set up the viewports and arranged the bitmaps I started by creating the cars inner wheel arch using a simple tube and then cutting the parts I didnt need. This was only done on one side however as I was only planning on creating one side of the car and then using the symetry tool to make it a full DB9. After I created the wheel arches I then proceded to create new polygones from the wheel archs and continued to do so to create the basic shape for the car. This is a time consuming method but for me I felt it was the least complicated method.

After the basic shape was complete I went on to design a wheel and inside alloy for it. This was done by creating 2 tubes and making one smooth (having more sides) and then making the size of each look correct. The back was created with a plane but now nowing how to effectivly use the cap and flip tools I will change the plane for a face made from the tubes.

The car now had 2 wheels, a basic shape, and cut out sections for windows. This had already been quiet time consumming and a third model was still needed to be made. I moved on to mirror the car using the symetry tool and then copied and moved both tires to create 4 wheels for the car.

The next step was to then start creating the windows for the Aston. The way i did this was by selecting the windows outlines, extruding them slightly to give depth, and then fill them with a seperate object. This object started as a box with multiple vertexs, which where slowly lined up with the window edge to create smooth windows. This was done for both side, front and rear windows.


The next step was to create headlights for the car. I found this to be one of the more difficult parts as i had trouble making them look relistic. Infact i took several long attempts which proved to end with unrealistic models(See below). Eventually i managed to create something that looked more realistic by extruding a small gap in the car, and then using the same technique I used for the windows, cover up the holes I had created.


The next thing to create was the wing mirrors. I did this by creating a block, shaping it and then extruding a space for the mirror block to be placed, like the window. The back was then curved and the shape was created using the chafer tool to create smooth corners. A box was then used to create the mirror and it was fitted the same was as the windows. A small cylinder was then added to use as a conection between the car and wing mirror. After this was fitted i then copied and mirrored a second wing mirror to fit on the opposite side.


After completing the model I then proceded to texture all of the different aspects of the model. The car and wheels where textured with car paint black/gray/silver whith the alloys being a slightly lighter silver. The windows and and lights where then textured with a reflective material with a 50% decrease in its alpha, meaning that they appeared more as black out windows. This was done because the interior of the car was not created, as this would be a waste of time for the animation.

The model was eventually finished with some detail. I would still like to work on it and add more detail such as working lights, front and read grills and door handels, but these are small editions that can be made later on.
MoodBoards
My mood board are boards filled with images i used to create my models for the James Bond Quantam of Solace trailer. These where used throughout my development of the models and used as refferences as well as inspiration. These images are ranged between the G36 gun, Aston Martin DB9 and the James Bond character model.
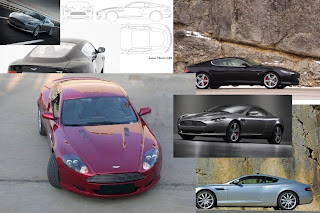 Aston Martin MoodBoard.
 HG36 MoodBoard.
 James Bond MoodBoard.


Monday 28 February 2011
Lighting
In our next tutorial we covered lighting which helped us learn the basics for lighting our models. The two main light techniques we learnt where target light, omni lights. The target light is used to light a particular target from a set area, causeing shadows and beams of light. The omni light is seen to have more of a lightbulb effect which will light a set area all around of it. The lightsource effects the objects on the viewport to an exstent but then really shows its powerful effects once rendered.
 The pumpkin in multiple viewports.
 The pumpkin in one viewport, before rendering.
 The pumpkin in the same viewport as above, after rendering.


G36 Model
The first model i tried to design was made around a month ago and based on the G36 automatic machine gun from the intro clip to the film. I started designing this by creating individual sections inside of Adobe Illistrator including the barrel, ammunition clip and stock.
These shapes are a few of the shapes i used to create the gun. I traced each one seperatly and then imported them into Maz Studios. To ensured this worked i drew a small, quick demo gun inside of Illistrator to see how the technique worked.
The bullet was also created inside of Illistrator by using a small outline drawing of half a bullet, from tip to butt. This gave me the easy option of using lathe modification inside of Max Studios.
After importing all of the splines the next step was to extrude them and put them into place. This took some effort as some splines would have trouble recognising where to have gaps and where to place faces.
After extruding most of the splines I found that I could create better looking objects inside of Max Studio for splines like the handel and nozzel. This was done by creating cylinders and tubes and then resizing, beveling and extruding different faces, vertex and sides. At this stage the bullet was also created using the lathe tool to use one side of an image and rotate it around a point to crate a 3D shape.
The gun's ammunition clip was then created and a front see through cover was added for a most custom cosmetic look. This was done by reducing the poly's alpha by half. The bullet was then copied and a line of bullets was fitted inside of the ammunition poly, with one remaining outside of the gun.
The next step was to go around the gun and edit the splines to make the gun look more relistic, mostly involving the trigger. This proved to be difficult at the time however as being my first model I was less comftable with the tools in Max Studios and had more trouble editing poly's. This took a lot of time and proved to be difficult with the tools i had learn't at the time. The model was however easier then my next and a lot of the shapes and sides where straight edges which ment that the model still looked moderatly how it was suppose to. Hopefully with more time I can improve or redesign the gun before animating, using the tools I now know.
After the gun was put together i began to add textures to the gun and bullet. The bullewt had a golden/brown texture which made it look more rustic and releastic, while the gun had both a black carbon texture and silver metal look to the nozzel and other parts. I did this by diffusing the texture materials and using seperate materials for the different splines.
The gun was completed and the bullet model imported into the same Max Studios file. The bullets are a key part to the model as i hope to be able to use them in more detail in the animation. The gun looks ok but could still use work however the second model has set me back quiet a bit in time and any improvement to the gun will have to be made later, before the animation stage.
 Images used to create model.
 Mock up design to help understand technical process.
 Bullet design inside Illistrator
 Some of the splines lined up.
 Bullet with wire frame.
 Ammunition clip with bullets inside.
 Edits made to the gun including the gun barrels air holes.
 The finished Gun.
 Finished model and rendition of the bullet.
 Finished rendition of the Gun.
These shapes are a few of the shapes i used to create the gun. I traced each one seperatly and then imported them into Maz Studios. To ensured this worked i drew a small, quick demo gun inside of Illistrator to see how the technique worked.
The bullet was also created inside of Illistrator by using a small outline drawing of half a bullet, from tip to butt. This gave me the easy option of using lathe modification inside of Max Studios.
After importing all of the splines the next step was to extrude them and put them into place. This took some effort as some splines would have trouble recognising where to have gaps and where to place faces.
After extruding most of the splines I found that I could create better looking objects inside of Max Studio for splines like the handel and nozzel. This was done by creating cylinders and tubes and then resizing, beveling and extruding different faces, vertex and sides. At this stage the bullet was also created using the lathe tool to use one side of an image and rotate it around a point to crate a 3D shape.
The gun's ammunition clip was then created and a front see through cover was added for a most custom cosmetic look. This was done by reducing the poly's alpha by half. The bullet was then copied and a line of bullets was fitted inside of the ammunition poly, with one remaining outside of the gun.
The next step was to go around the gun and edit the splines to make the gun look more relistic, mostly involving the trigger. This proved to be difficult at the time however as being my first model I was less comftable with the tools in Max Studios and had more trouble editing poly's. This took a lot of time and proved to be difficult with the tools i had learn't at the time. The model was however easier then my next and a lot of the shapes and sides where straight edges which ment that the model still looked moderatly how it was suppose to. Hopefully with more time I can improve or redesign the gun before animating, using the tools I now know.
After the gun was put together i began to add textures to the gun and bullet. The bullewt had a golden/brown texture which made it look more rustic and releastic, while the gun had both a black carbon texture and silver metal look to the nozzel and other parts. I did this by diffusing the texture materials and using seperate materials for the different splines.
The gun was completed and the bullet model imported into the same Max Studios file. The bullets are a key part to the model as i hope to be able to use them in more detail in the animation. The gun looks ok but could still use work however the second model has set me back quiet a bit in time and any improvement to the gun will have to be made later, before the animation stage.


Subscribe to:
Posts (Atom)